

 (Picture:
 Cropping images is a fairly common use case in a Web application. For example, some applications let you upload a profile picture. In addition, it usually also let you crop and resize the image for a better result. Unfortunately, when dealing with image processing we need to install a few dependencies, both in the front-end and in the back-end.
In this tutorial I will demonstrate how to upload an image, display a preview in a modal, crop the image and finally upload it and save in the server.
If you are not familiar with file upload in Django, check this post for a quick reference: How to Upload Files With Django.
Installing Dependencies
In the following example I will be using:
- Python 3.6.0
- Django 1.10.5
- Pillow 4.0.0
- jQuery 3.1.1
- Cropper v3.0.0-beta
Within your project directory or virtualenv, install Pillow:
pip install PillowI know, I know… Sometimes installing Pillow is a nightmare. If you face any problem installing it locally, please refer to the Pillow’s Installation Guide.
The jQuery utility to crop images in the Web browser can be downloaded here. Or if you prefer to use it’s pure JavaScript version, download Cropper.js here. But please note that in the examples below I will be using the jQuery version.
Background
For this example, consider the following model:
models.py
from django.db import models

class Photo(models.Model):
    file = models.ImageField()
    description = models.CharField(max_length=255, blank=True)
    uploaded_at = models.DateTimeField(auto_now_add=True)

    class Meta:
        verbose_name = 'photo'
        verbose_name_plural = 'photos'
I’m also using Bootstrap 3 in the example, so my base template looks like this:
base.html
{% load static %}<!DOCTYPE html>
<html lang="en">
  <head>
    <meta charset="utf-8">
    <meta http-equiv="X-UA-Compatible" content="IE=edge">
    <meta name="viewport" content="width=device-width, initial-scale=1">
    <title>{% block title %}Simple is Better Than Complex{% endblock %}</title>
    <link href="{% static 'css/bootstrap.min.css' %}" rel="stylesheet">
    <!--[if lt IE 9]>
      <script src="https://oss.maxcdn.com/html5shiv/3.7.3/html5shiv.min.js"></script>
      <script src="https://oss.maxcdn.com/respond/1.4.2/respond.min.js"></script>
    <![endif]-->
    <link href="{% static 'css/cropper.min.css' %}" rel="stylesheet">
  </head>
  <body>
    <div class="container">
      {% block content %}
      {% endblock %}
    </div>
    <script src="{% static 'js/jquery-3.1.1.min.js' %}"></script>
    <script src="{% static 'js/bootstrap.min.js' %}"></script>
    <script src="{% static 'js/cropper.min.js' %}"></script>
    {% block javascript %}
    {% endblock %}
  </body>
</html>
The Image Cropping Form
In order to crop the image, we need four pieces of information: X coordinate, Y coordinate, height and width of the cropping box the user will eventually play with in the browser.
forms.py
from PIL import Image
from django import forms
from django.core.files import File
from .models import Photo

class PhotoForm(forms.ModelForm):
    x = forms.FloatField(widget=forms.HiddenInput())
    y = forms.FloatField(widget=forms.HiddenInput())
    width = forms.FloatField(widget=forms.HiddenInput())
    height = forms.FloatField(widget=forms.HiddenInput())

    class Meta:
        model = Photo
        fields = ('file', 'x', 'y', 'width', 'height', )

    def save(self):
        photo = super(PhotoForm, self).save()

        x = self.cleaned_data.get('x')
        y = self.cleaned_data.get('y')
        w = self.cleaned_data.get('width')
        h = self.cleaned_data.get('height')

        image = Image.open(photo.file)
        cropped_image = image.crop((x, y, w+x, h+y))
        resized_image = cropped_image.resize((200, 200), Image.ANTIALIAS)
        resized_image.save(photo.file.path)

        return photo
So far, what’s happening here: I defined a ModelForm using the Photo model. In this form, we will capture the
file field, which is our image. I also defined 4 new inputs to store the information we need to crop the image.
This example can be optimized, reducing the number of IO operations. It also need a few validations, to guarantee the integrity of the data.
The Image Cropping View
The view is business as usual. Just form processing, nothing special. In this example, here is my basic function-based view:
views.py
from django.shortcuts import render, redirect

from .models import Photo
from .forms import PhotoForm


def photo_list(request):
    photos = Photo.objects.all()
    if request.method == 'POST':
        form = PhotoForm(request.POST, request.FILES)
        if form.is_valid():
            form.save()
            return redirect('photo_list')
    else:
        form = PhotoForm()
    return render(request, 'album/photo_list.html', {'form': form, 'photos': photos})
The Image Cropping Template
Here is where things get a little bit more tricky. First, check the structure of our template (please note that the JavaScript can be extracted to an external file):
photo_list.html
{% extends 'base.html' %}

{% block javascript %}
  <script>
    $(function () {

      /* SCRIPT TO OPEN THE MODAL WITH THE PREVIEW */
      $("#id_file").change(function () {
        // ...
      });

      /* SCRIPTS TO HANDLE THE CROPPER BOX */
      var $image = $("#image");
      // ...

      /* SCRIPT TO COLLECT THE DATA AND POST TO THE SERVER */
      $(".js-crop-and-upload").click(function () {
        // ...
      });

    });
  </script>
{% endblock %}

{% block content %}
  <!-- FORM TO UPLOAD THE IMAGES -->
  <form method="post" enctype="multipart/form-data" id="formUpload">
    ...
  </form>

  <!-- MODAL TO CROP THE IMAGE -->
  <div class="modal fade" id="modalCrop">
    ...
  </div>

  <!-- CONTAINER TO DISPLAY THE CROPPED IMAGES -->
  <div class="row" style="margin-top: 20px">
    ...
  </div>
{% endblock %}
Alright, let’s cover the HTML part first.
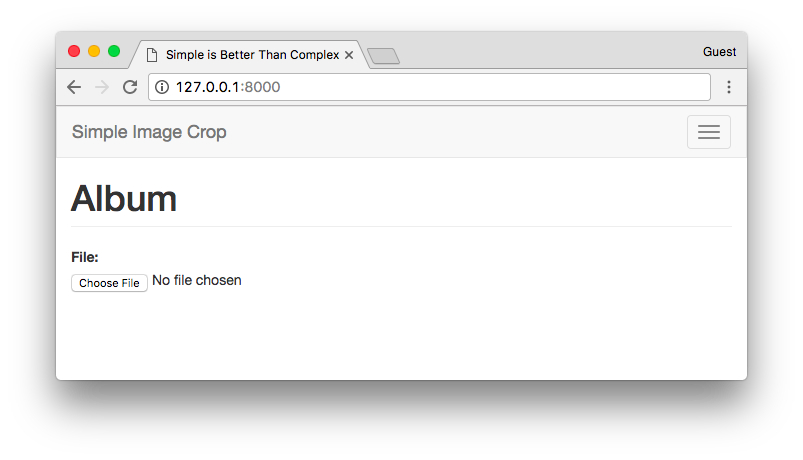
The form, simply render it as it is:
<!-- FORM TO UPLOAD THE IMAGES -->
<form method="post" enctype="multipart/form-data" id="formUpload">
  {% csrf_token %}
  {{ form }}
</form>
Don’t forget the enctype.
The form will render like this:
Now, the modal:
<!-- MODAL TO CROP THE IMAGE -->
<div class="modal fade" id="modalCrop">
<div class="modal-dialog">
<div class="modal-content">
<div class="modal-header">
<button type="button" class="close" data-dismiss="modal" aria-label="Close">
<span aria-hidden="true">×</span>
</button>
<h4 class="modal-title">Crop the photo</h4>
</div>
<div class="modal-body">
<img src="" id="image" style="max-width: 100%;">
</div>
<div class="modal-footer">
<div class="btn-group pull-left" role="group">
<button type="button" class="btn btn-default js-zoom-in">
<span class="glyphicon glyphicon-zoom-in"></span>
</button>
<button type="button" class="btn btn-default js-zoom-out">
<span class="glyphicon glyphicon-zoom-out"></span>
</button>
</div>
<button type="button" class="btn btn-default" data-dismiss="modal">Nevermind</button>
<button type="button" class="btn btn-primary js-crop-and-upload">Crop and upload</button>
</div>
</div>
</div>
</div>It’s just a regular Bootstrap modal with a few other options. The most important bit here is the placeholder image:
<img src="" id="image" style="max-width: 100%;">. It is very important that the image tag have a max-width of 100%.
A few css classes that will be used later on to trigger some actions:
.js-zoom-in.js-zoom-out.js-crop-and-upload
The modal will render like this:
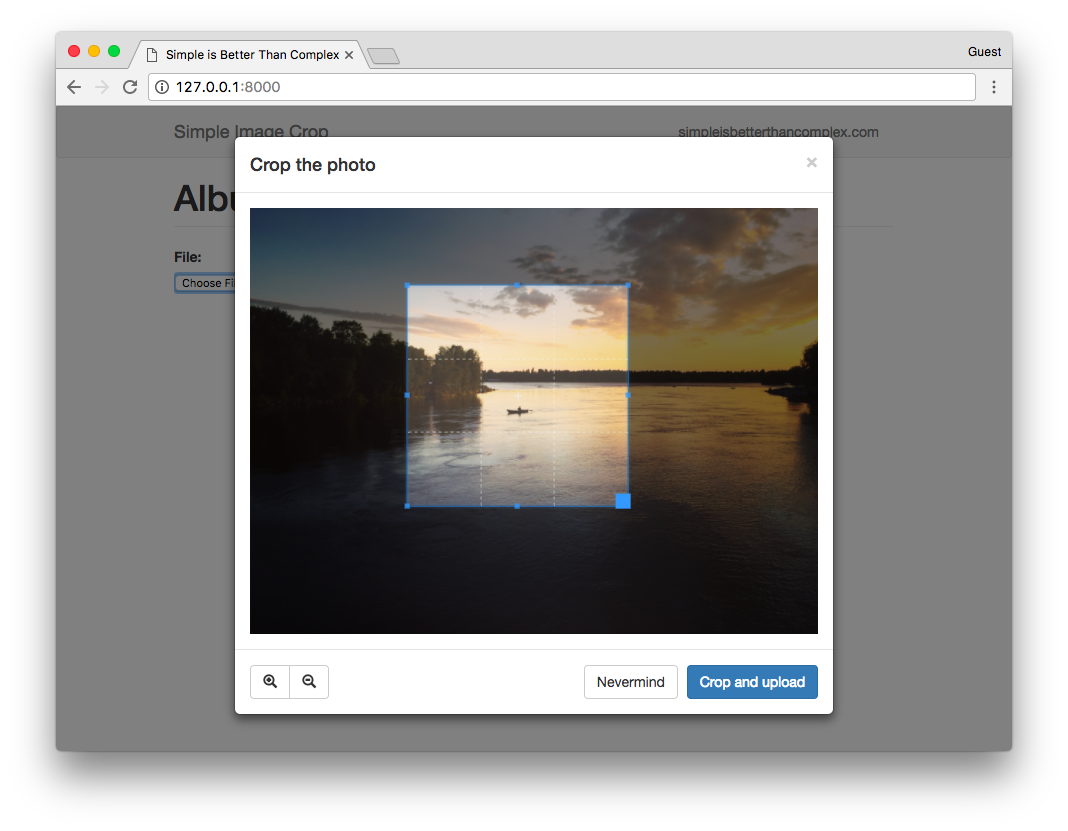
(Nice picture, right? I took it with my phone in Oulu, Finland last summer.)
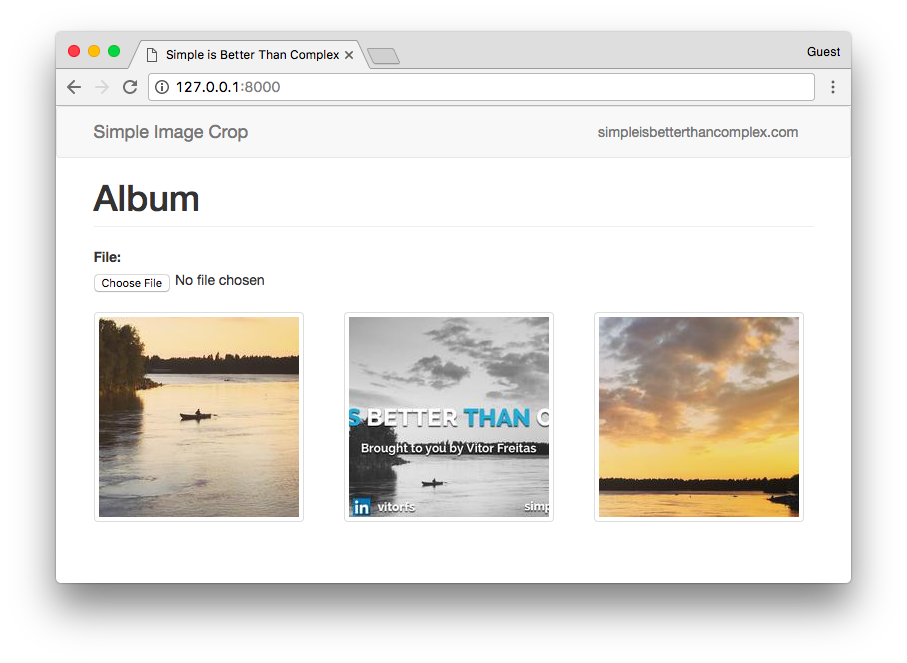
Finally, the container where I display the cropped images:
<!-- CONTAINER TO DISPLAY THE CROPPED IMAGES -->
<div class="row" style="margin-top: 20px">
  {% for photo in photos %}
    <div class="col-sm-4 col-md-3">
      <img src="{{ photo.file.url }}" class="thumbnail">
    </div>
  {% endfor %}
</div>
The final result:
The JavaScript
This is the last part. The JavaScript will put everything together.
Let’s break it down step by step, like we did in the template part.
Displaying the preview inside a modal after the user selects the image:
/* SCRIPT TO OPEN THE MODAL WITH THE PREVIEW */
$("#id_file").change(function () {
  if (this.files && this.files[0]) {
    var reader = new FileReader();
    reader.onload = function (e) {
      $("#image").attr("src", e.target.result);
      $("#modalCrop").modal("show");
    }
    reader.readAsDataURL(this.files[0]);
  }
});
We’re adding a listener to the #id_file element, which is the file input from our form. When the data change (that
is, when the user select a new image), we preload it in the Web browser and open the modal.
The Cropper will be configured next, when the modal and the image is displayed to the user.
/* SCRIPTS TO HANDLE THE CROPPER BOX */
var $image = $("#image");
var cropBoxData;
var canvasData;
$("#modalCrop").on("shown.bs.modal", function () {
  $image.cropper({
    viewMode: 1,
    aspectRatio: 1/1,
    minCropBoxWidth: 200,
    minCropBoxHeight: 200,
    ready: function () {
      $image.cropper("setCanvasData", canvasData);
      $image.cropper("setCropBoxData", cropBoxData);
    }
  });
}).on("hidden.bs.modal", function () {
  cropBoxData = $image.cropper("getCropBoxData");
  canvasData = $image.cropper("getCanvasData");
  $image.cropper("destroy");
});

// Enable zoom in button
$(".js-zoom-in").click(function () {
  $image.cropper("zoom", 0.1);
});

// Enable zoom out button
$(".js-zoom-out").click(function () {
  $image.cropper("zoom", -0.1);
});
You can make further configuration inside the $image.cropper({ ... }). For further instructions check the
Cropper Docs.
I’m setting the aspect ratio to be 1:1 and the min width of the box to be 200x200. The view mode refers to limit the
image size to be at least the size of the box.
The last step now is to actually submit all this information to the server. At any time, you can grab the cropper data by calling it like this:
$image.cropper("getData");

// returns...
{
  "x": 128,
  "y": 72,
  "width": 1024,
  "height": 576,
  "rotate": 0,
  "scaleX":1,
  "scaleY": 1
}
That’s what we need. Let’s use this info to fill the extra information in our form:
/* SCRIPT TO COLLECT THE DATA AND POST TO THE SERVER */
$(".js-crop-and-upload").click(function () {
  var cropData = $image.cropper("getData");
  $("#id_x").val(cropData["x"]);
  $("#id_y").val(cropData["y"]);
  $("#id_height").val(cropData["height"]);
  $("#id_width").val(cropData["width"]);
  $("#formUpload").submit();
});
And that’s it!
Final Template and Scripts
All the pieces together:
photo_list.html:
{% extends 'base.html' %}
{% block javascript %}
<script>
$(function () {
/* SCRIPT TO OPEN THE MODAL WITH THE PREVIEW */
$("#id_file").change(function () {
if (this.files && this.files[0]) {
var reader = new FileReader();
reader.onload = function (e) {
$("#image").attr("src", e.target.result);
$("#modalCrop").modal("show");
}
reader.readAsDataURL(this.files[0]);
}
});
/* SCRIPTS TO HANDLE THE CROPPER BOX */
var $image = $("#image");
var cropBoxData;
var canvasData;
$("#modalCrop").on("shown.bs.modal", function () {
$image.cropper({
viewMode: 1,
aspectRatio: 1/1,
minCropBoxWidth: 200,
minCropBoxHeight: 200,
ready: function () {
$image.cropper("setCanvasData", canvasData);
$image.cropper("setCropBoxData", cropBoxData);
}
});
}).on("hidden.bs.modal", function () {
cropBoxData = $image.cropper("getCropBoxData");
canvasData = $image.cropper("getCanvasData");
$image.cropper("destroy");
});
$(".js-zoom-in").click(function () {
$image.cropper("zoom", 0.1);
});
$(".js-zoom-out").click(function () {
$image.cropper("zoom", -0.1);
});
/* SCRIPT TO COLLECT THE DATA AND POST TO THE SERVER */
$(".js-crop-and-upload").click(function () {
var cropData = $image.cropper("getData");
$("#id_x").val(cropData["x"]);
$("#id_y").val(cropData["y"]);
$("#id_height").val(cropData["height"]);
$("#id_width").val(cropData["width"]);
$("#formUpload").submit();
});
});
</script>
{% endblock %}
{% block content %}
<h1 class="page-header">Album</h1>
<!-- FORM TO UPLOAD THE IMAGES -->
<form method="post" enctype="multipart/form-data" id="formUpload">
{% csrf_token %}
{{ form }}
</form>
<!-- MODAL TO CROP THE IMAGE -->
<div class="modal fade" id="modalCrop">
<div class="modal-dialog">
<div class="modal-content">
<div class="modal-header">
<button type="button" class="close" data-dismiss="modal" aria-label="Close">
<span aria-hidden="true">×</span>
</button>
<h4 class="modal-title">Crop the photo</h4>
</div>
<div class="modal-body">
<img src="" id="image" style="max-width: 100%;">
</div>
<div class="modal-footer">
<div class="btn-group pull-left" role="group">
<button type="button" class="btn btn-default js-zoom-in">
<span class="glyphicon glyphicon-zoom-in"></span>
</button>
<button type="button" class="btn btn-default js-zoom-out">
<span class="glyphicon glyphicon-zoom-out"></span>
</button>
</div>
<button type="button" class="btn btn-default" data-dismiss="modal">Nevermind</button>
<button type="button" class="btn btn-primary js-crop-and-upload">Crop and upload</button>
</div>
</div>
</div>
</div>
<!-- CONTAINER TO DISPLAY THE CROPPED IMAGES -->
<div class="row" style="margin-top: 20px">
{% for photo in photos %}
<div class="col-sm-4 col-md-3">
<img src="{{ photo.file.url }}" class="thumbnail">
</div>
{% endfor %}
</div>
{% endblock %}Conclusions
This is the do it yourself version of image cropping, so you can see how it works. It also gives you lot’s of freedom to play with the options.
Please note that this is a preliminary implementation. Further validation of the uploaded image, the dimensions, etc is necessary to guarantee a reliable result.
You can grab the code used in this example on GitHub:
 How to Integrate Highcharts.js with Django
 How to Implement Dependent/Chained Dropdown List with Django
 How to Create Infinite Scroll With Django
 How to Extend Django User Model
 How to Setup a SSL Certificate on Nginx for a Django Application
 How to Deploy a Django Application to Digital Ocean